Transform your remote Design Thinking sessions with Conceptboard
"The free version is perfect for students, no board invitations are necessary and templates for e.g. empathy mapping are readily available. As everyone has a ‘virtual pen’ right on the board, this can be really efficient."- Johannes Baeck
By now, you’ve probably heard of Design Thinking, but what does it really mean? To put it simply: the Design Thinking process is promoted as creative problem solving. It’s about flipping problems on their head and focusing on the human needs behind problems. By asking different questions, we will get different solutions.
Design Thinking methodologies have already been adopted by big enterprises who strive to bring innovation into their organization but often face “that’s how we do things here” attitudes. Given the rise in the number of teams and organizations that are geographically distributed, conducting seamless remote Design Thinking workshops is the need of the hour.
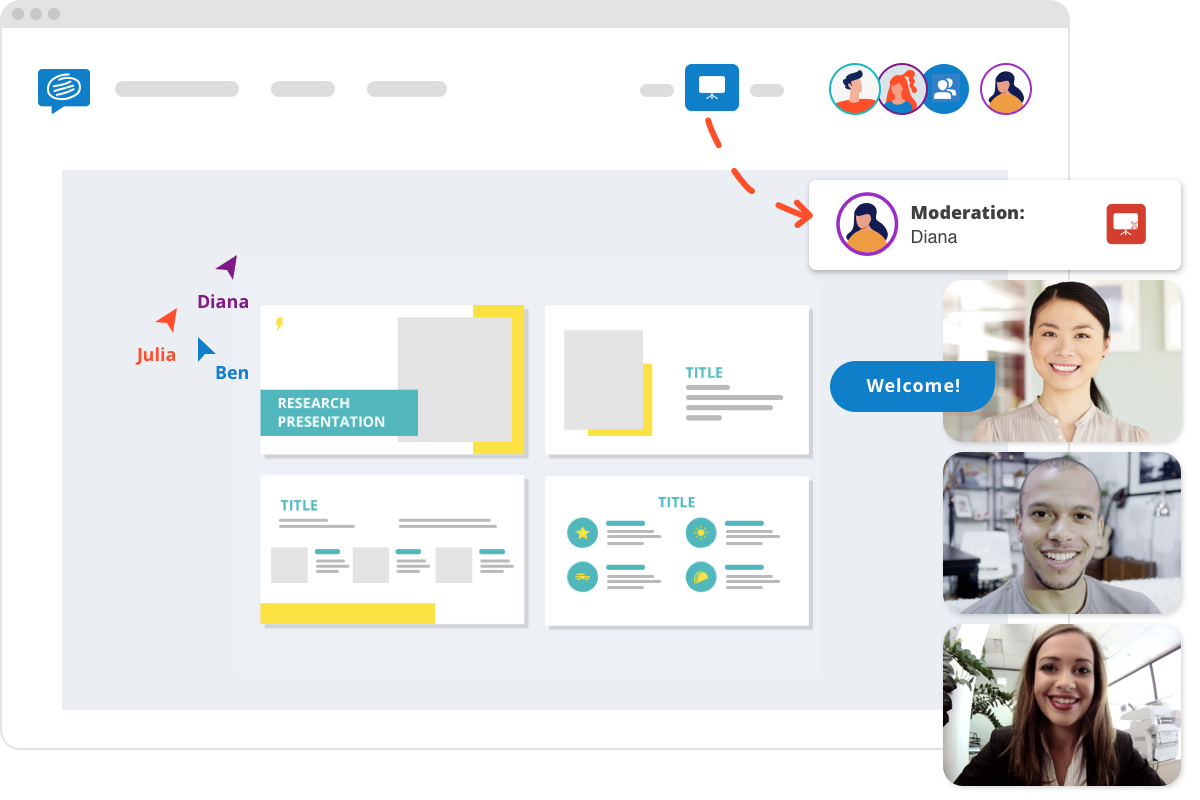
When it comes to remote Design Thinking workshops, a collaborative online whiteboard such as Conceptboard is an indispensable addition to your Design Thinking toolkit. Johannes Baeck uses Conceptboard as a digital wall for virtual sticky notes during a remote Design Thinking workshop at the University of Hildesheim.
“The free version is perfect for students, no board invitations are necessary and templates for e.g. empathy mapping are readily available. As everyone has a ‘virtual pen’ right on the board, this can be really efficient.”- Johannes Baeck
Read on to discover how Conceptboard can ignite creativity, foster innovation and accelerate problem solving at every stage in a remote Design Thinking workshop.
5 ways Conceptboard can support your Remote Design Thinking Workshops
In order to enable you to seamlessly adopt Conceptboard’s collaborative online whiteboard for your remote Design thinking workshops, we’ve come up with five ways to get started now using some of our most popular Design Thinking templates.
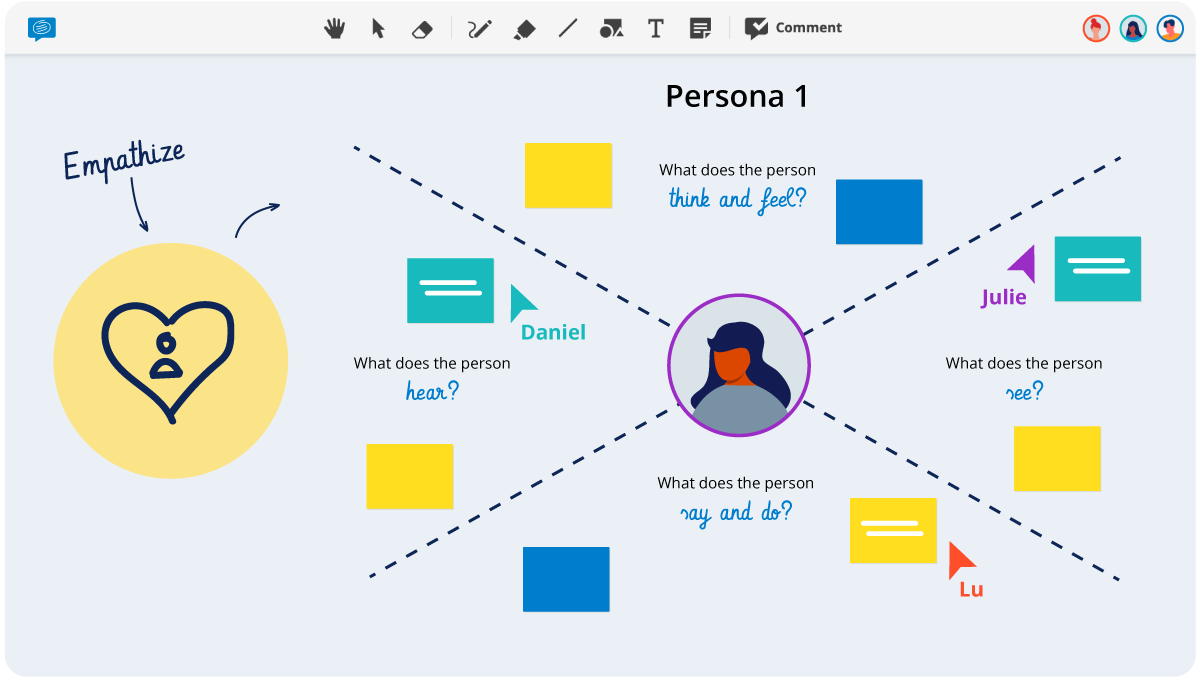
1. Build customer empathy
Getting to know your customers and putting yourself in the customer’s shoes is the first step in the Design Thinking process. Empathy in building a product, experience or service essentially boils down to looking at the world through your customer’s eyes to identify not just their needs and pain points but also their emotional drivers.
The three templates outlined below will help you define your ideal customer, understand their path to purchase, and develop empathy towards their needs.
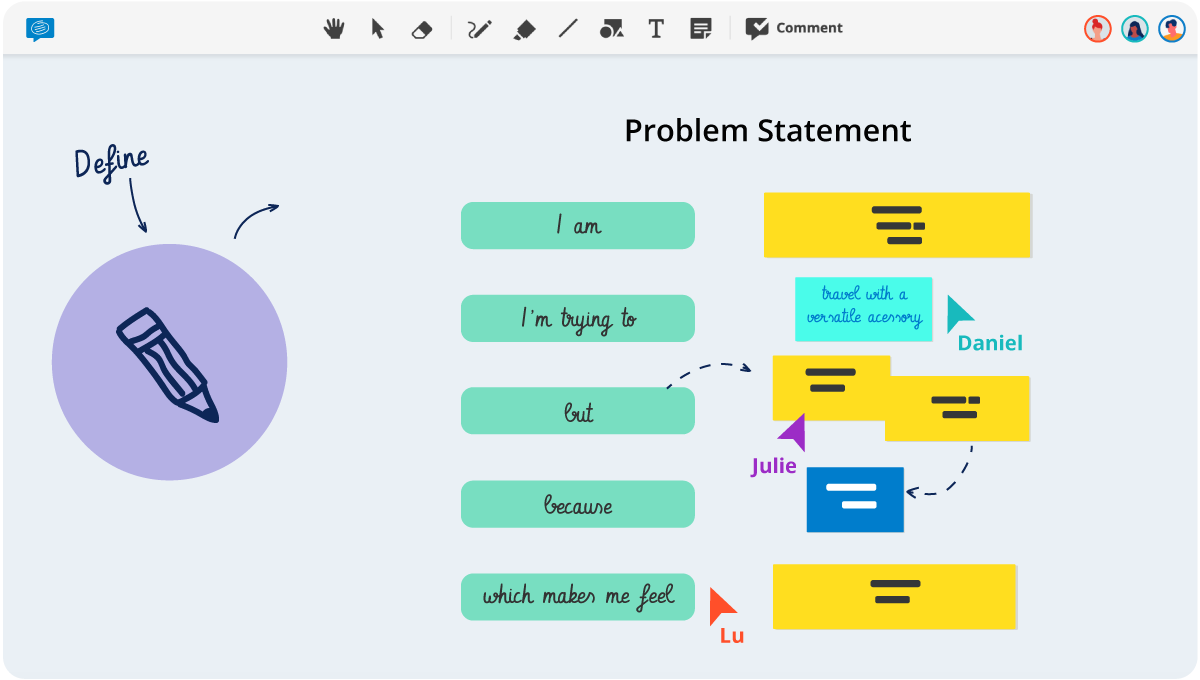
2. Define the problem
Create a problem statement based on the notes and thoughts you have gained in the previous step. You should also refer to any market research, customer service feedback or other public research to help you truly define the problem. If you don’t have any research, it’s time to start talking to your customers and clients.
Define the problem in a user-centric way, so that you can find user-centric solutions.
This step is iterative, so be prepared to present your come back and redefine your problem statement as you move through the later phases.
The Six Thinking Hats template or the Fishbone Diagram are great ways to help you refine your problem statement.
 Click image to use free template
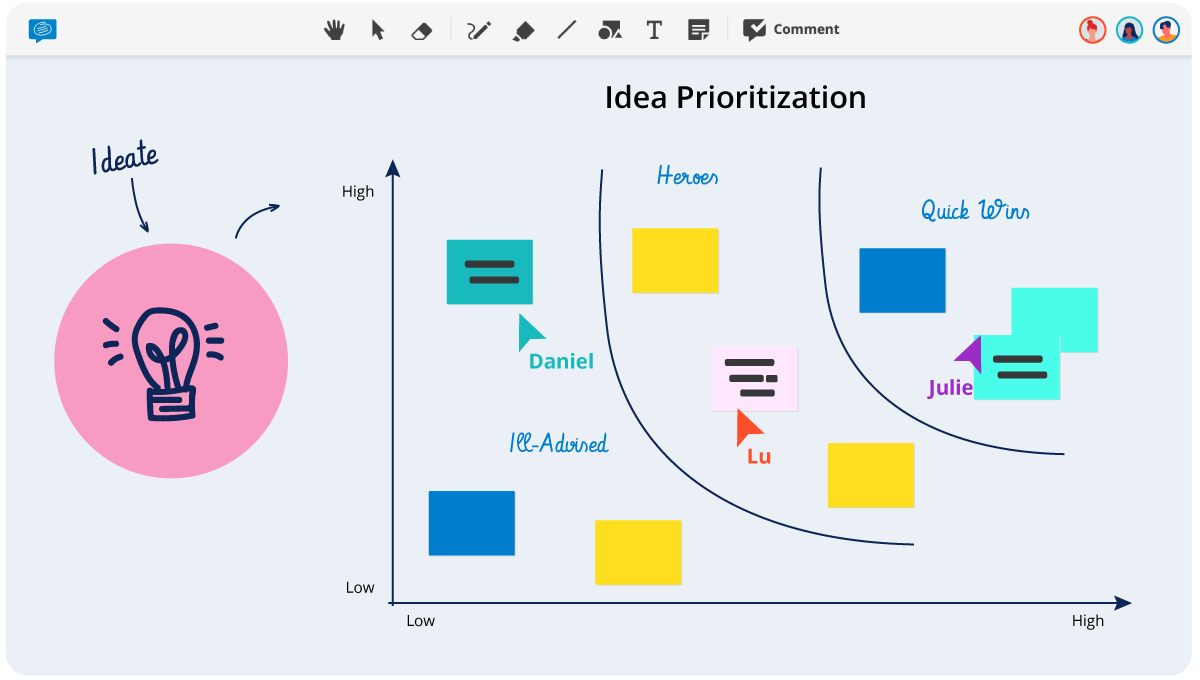
3. Explore creative ideas
It’s no surprise that asking conventional questions will deliver conventional answers. In the case of a company looking at ways to improve their retention rate, instead of asking “How can we improve” they instead started asking, “What employee experiences would you have liked to be part of?” Not only does this second question focus on the user’s needs, it’s more detailed and thought-out, which will in turn generate better answers.
It’s also important to include diverse voices in any problem solving questions. This may mean including staff from various departments, or conducting market research with a diverse customer base. In order to foster a more inclusive ideation session, the Brainwriting method can be a good alternative to traditional collaborative brainstorming.
You can use this free Idea Board template to collect ideas in an organized fashion, the Idea Prioritization template to help you decide which ideas to focus on, or simply open a new blank board with endless space for out of the box thinking. The old saying “No idea is a bad idea” rings true- you never know which ones will be the winner.
 Click image to use free template
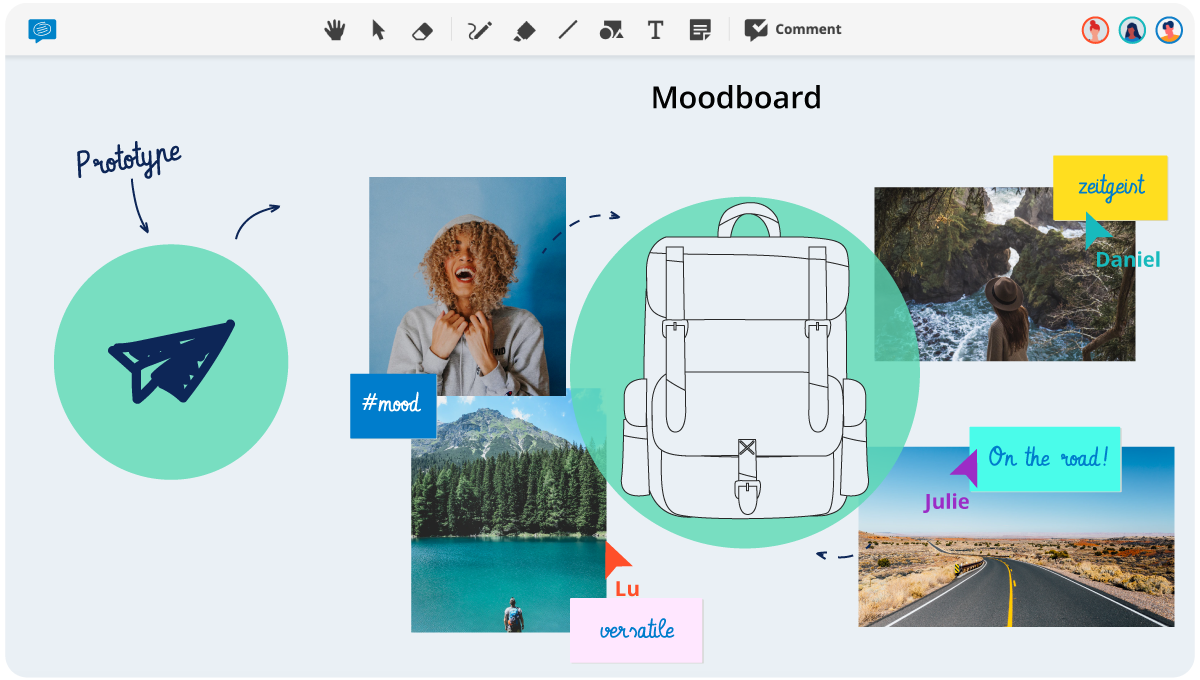
4. Build simple prototypes
Once you’ve identified customer needs and problems, you can start building basic prototypes. This step is based on the tangibility rule: by making ideas tangible by creating low-fidelity prototypes, we can explain them more effectively.
The prototype could be something like mapping out a new website homepage layout, designing a new version of an employee exit survey, or creating a mood board to showcase the new design direction. The important thing is to remember that Design Thinking is an iterative process, so you should be always willing to continually evolve this prototype in order to continually improve. During the prototyping phase, take advantage of Conceptboard’s powerful section tool to create presentation style slides that can be shown presentation style or downloaded as a PDF.
The major benefit of showcasing your prototype on Conceptboard is the ability to collect feedback directly on the board. Simply select the Reviewer access role then share the board’s link with any relevant stakeholders or customers and they’ll be able to share comments, highlight or scribble, without editing any of the content.
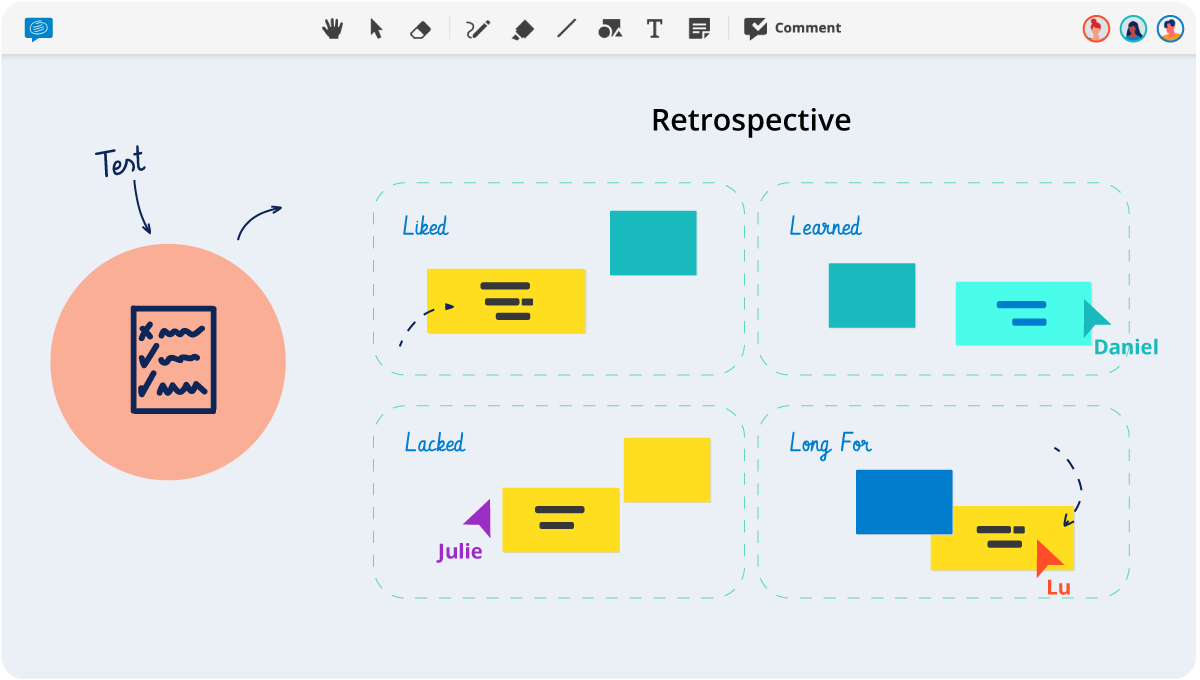
5. Test and refine
Now it’s time to put your hard work to the test. Take the prototype to your customers and collect their feedback to identify any possible issues or roadblocks. Whether it’s a new website, or a new piece of technology, it’s important to show- not tell. By putting it to the test in-situ you can gather real feedback. Don’t be afraid of feedback, both positive and negative will help you continually refine your product. Remember, Design Thinking is about human-centric design, so your product isn’t finished until it’s solved your problem statement by satisfying your customers needs.
A useful template to compile the feedback of each test phase is the Retrospective canvas. It prompts you to answer: What went well? What was bad? Further ideas? Possible actions?
While it is important to recognize and acknowledge what went right, if things go wrong, it’s equally as important to understand and analyse what went wrong! The 5 whys template helps you get to the root of a specific problem quickly and objectively.
 Click image to use free template
As you can see, a remote Design Thinking session doesn’t have to be hard, and it’s not complex, it’s simply a new way of looking at old problems. While we’ve outlined the stages as five sequential steps, it’s certainly not a straight-forward linear process. Be prepared to go back and forth between steps multiple times, or in a circular pattern until you find the right problem and solution.
Effective remote design thinking
Get your distributed team on the same page and craft innovative solutions across locations with Conceptboard
If you would like to go deeper into Design Thinking, check out this article from Harvard Business Review about why Design Thinking Works. If you’d like to explore more tools Conceptboard has developed for remote teams, check out our full suite of free templates here.